What is Hyper-V?
Whenever you need to run another operating system on your current computer concurrently you need a hypervisor. A hypervisor is a software layer that enables you to create and manage virtual machines on a computer or within an operating system. There are several hypervisors available on the market: VMware Workstation Pro/Player, VMware ESXi, VMware vSphere, Microsoft Hyper-V, Oracle Virtual Box, RedHat KVM. But most of aforementioned hypervisor you need to download and install separately or being charged with certain fees. The good news is that if you’re running a Windows 8 Pro or above you have a free built–in hypervisor available – the Hyper-V.
Hyper-V is a hypervisor developed by Microsoft and released in 2008. Back in the time its predecessor was called Windows Virtual PC for running Windows XP Mode on Windows 7 host. So far Hyper-V is considered the most widely available hypervisor around the world. With Hyper-V you can run most of guest operating systems like Windows 7 or above, Ubuntu, FreeBSD, Debian, CentOS, etc.
By using Hyper-V you can run multiple operating systems as virtual machines on Windows. This is very helpful for people like us as an IT professional, or technology enthusiast, or software developer, etc. So we can leverage Hyper-V to perform experiment with other operating systems, or test with certain software for compatibility issue or security issues, or even just for fun…
System requirements for Hyper-V
Before you try to enable Hyper-V on your computer, you need to check the operating system and hardware requirements.
By default, Hyper-V is available on 64bit version of Windows 8/10/11 Pro, Enterprise, Education, and Windows Server. It is not available on the Home edition. (However, you can purchase a Pro license to upgrade from Home edition).
For hardware requirements you need to make sure that:
- A 64bit processor with second-level address translation (SLAT).
- A processor with VM Monitor Mode extensions.
- Sufficient memory (RAM) for the host and guest VMs. Minimum of 4GB RAM.
- Intel Virtualization Technology (Intel-VT) or AMD Virtualization (AMD-V) enabled.
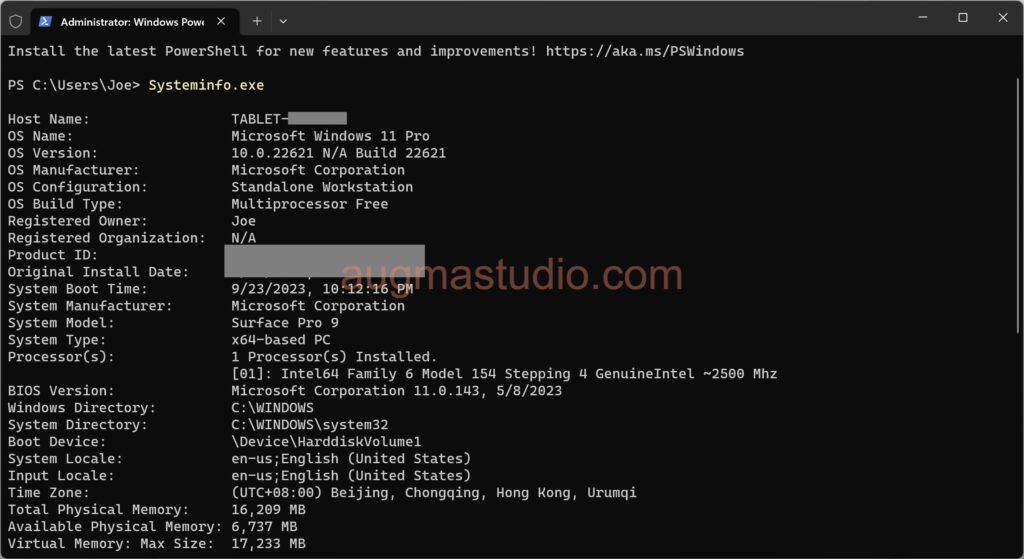
You can run “systeminfo.exe” in PowerShell or CMD to verify the hardware requirements.
Guest operating system supported by Hyper-V
An operating system that runs in a VM is commonly referred to as a guest operating system. The following are the guest operating system that supported by Hyper-V. Note, the support list may differ from Hyper-V on Windows to Windows Server.
- Windows 7 / 8 / 8.1 / 10 / 11
- Windows Server 2008 / 2008 R2 / 2012 / 2012 R2 / 2016 / 2019 / 2022
- CentOS and Red Hat Enterprise Linux
- Debian
- SUSE
- Ubuntu
- FreeBSD
For a full list of supported guest operating system check this: Supported Windows guests | Microsoft Learn.
The difference between Hyper-V on Windows and Hyper-V on Windows Server
As mentioned above, there are some features that may not available on Windows compare to the counterpart running in Windows Server.
Hyper-V features only available on Windows:
- Quick Create and the VM Gallery
- Default network (NAT switch)
Hyper-V features only available on Windows Server:
- Live migration of virtual machines from one host to another
- Hyper-V Replica
- Virtual Fiber Channel
- SR-IOV networking
- Shared.VHDX
Other features of Hyper-V on Windows Server
- Management and connectivity
Manage Hyper-V environment with the Hyper-V Manager, Hyper-V module for Windows PowerShell, Virtual Machine Connection (VMConnect), and Windows PowerShell Direct.
- Portability
Provides features such as live migration, storage migration, and standard import/export functionality.
- Disaster recovery and backup
Support Hyper-V Replica, which creates copies of VMs in other physical locations. These copies can be used to restore VM instances as needed. Other features such as production checkpoints and support for Volume Shadow Copy Service (VSS) facilitate application-consistent backups of VM states.
- Security
Support security features such as Secure Boot and shielded VMs. Secure Boot verifies digital signatures on files during startup to protect against malware. Virtual disks in shielded VMs are encrypted to secure access, and the VMs can only run on specific, protected hosts.
- Optimization
Includes a set of customized services and drivers called Integration Services. These Integration Services include Time Synchronization, Operating System Shutdown, Data Exchange, Heartbeat, Backup, and Guest Services.
How to enable Hyper-V
For enable Hyper-V on Windows there are three methods available:
- Enable Hyper-V via Windows PowerShell
- Enable Hyper-V via Control Panel
- Enable Hyper-V via DISM in CMD
For enable Hyper-V on Windows Server there are three methods available:
- Enable Hyper-V via Server Manager
- Enable Hyper-V via Windows PowerShell
- Enable Hyper-V via Windows Admin Center
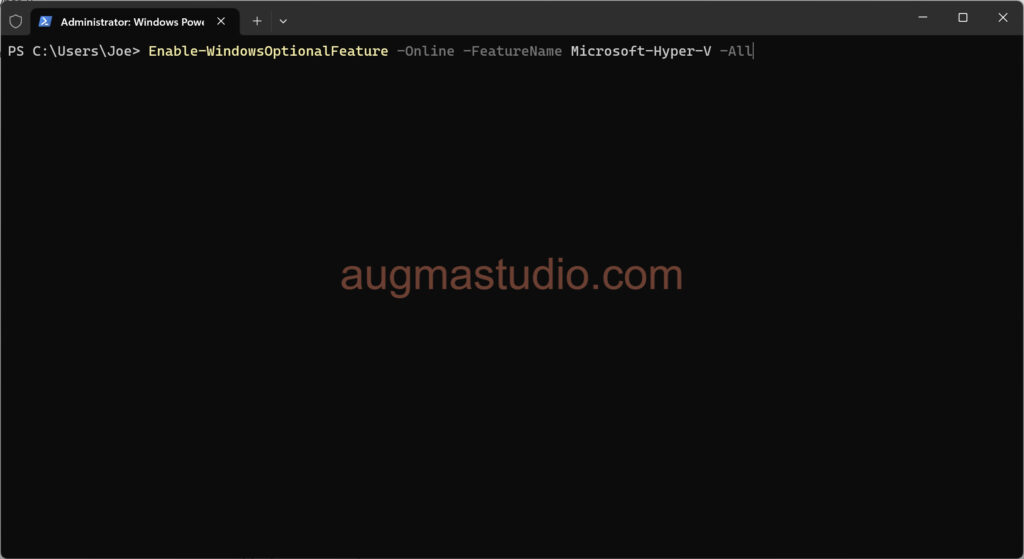
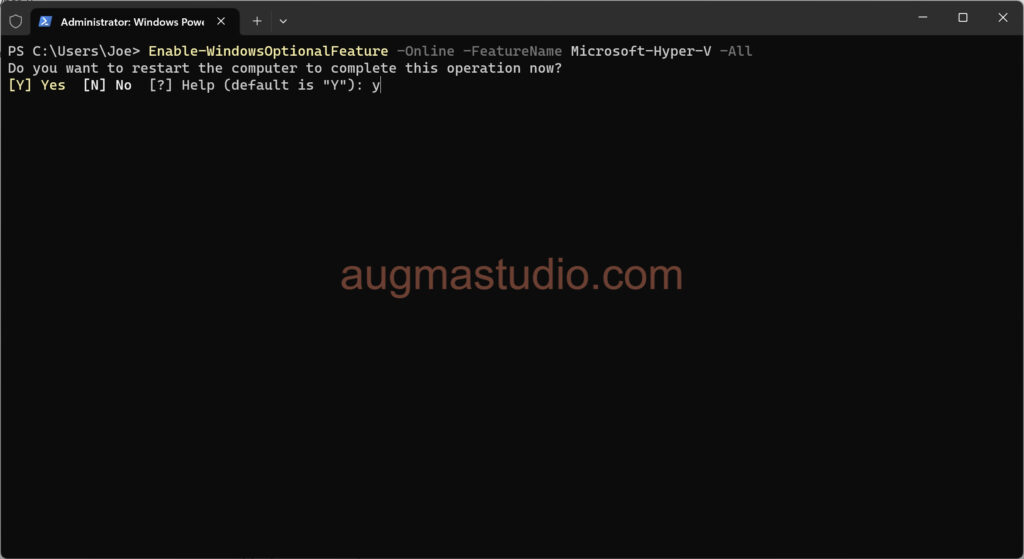
Enable Hyper-V via Windows PowerShell
- Press “Windows logo key + X” > select “Terminal (Admin)”.
- Enter “Enable-WindowsOptionalFeature -Online -FeatureName Microsoft-Hyper-V -All”.

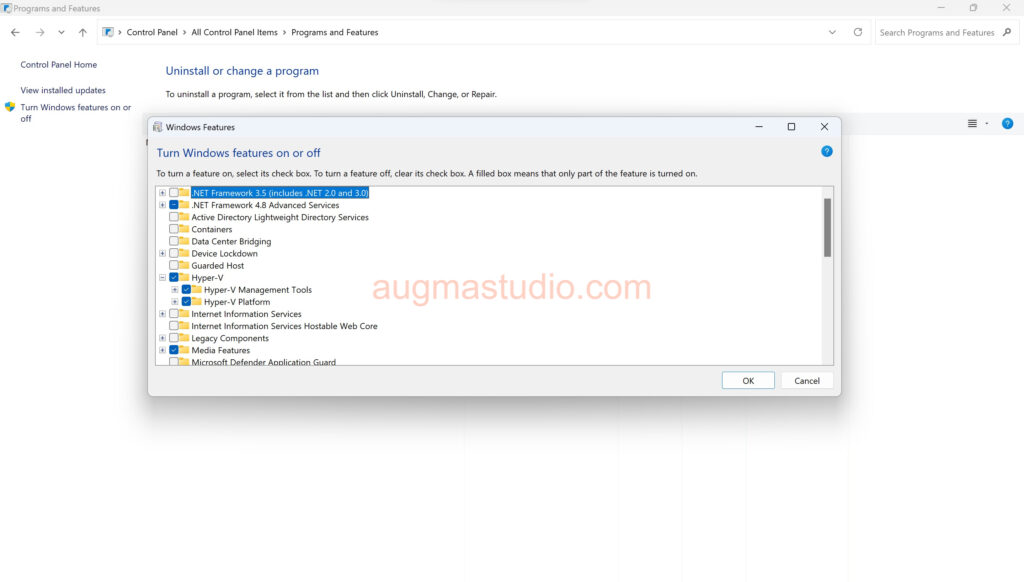
Enable Hyper-V via Control Panel
- Click Start menu > search “Control Panel” > Program and Features.
- Click “Turn Windows Features on or off” > Select Hyper-V.
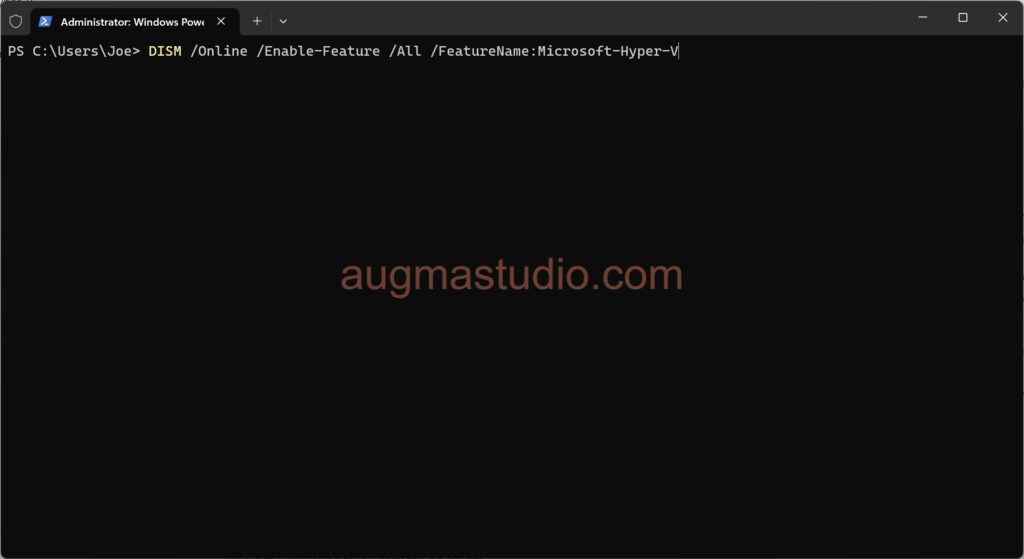
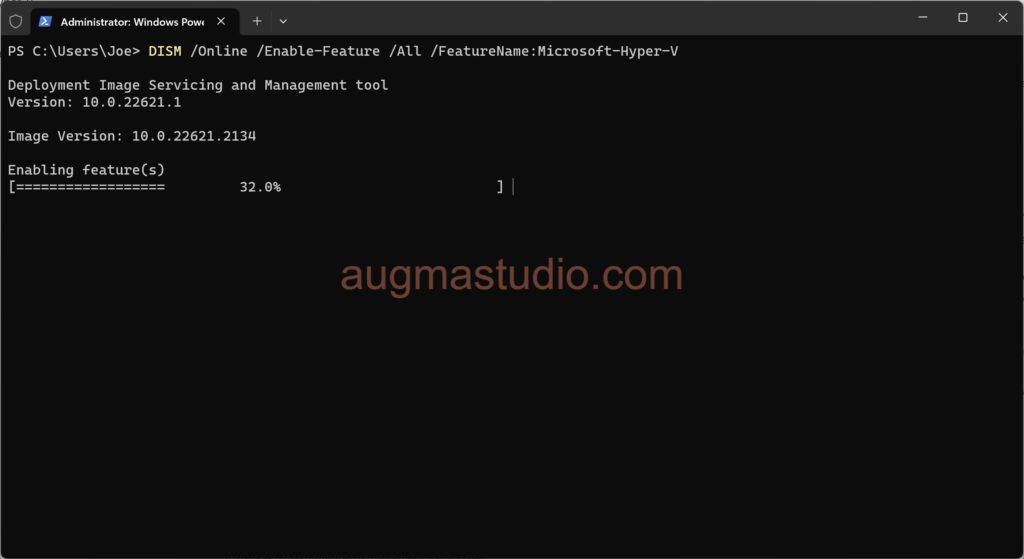
Enable Hyper-V via DISM in CMD
- Press “Windows logo key + X” > select “Terminal (Admin)”.
- Enter “DISM /Online /Enable-Feature /All /FeatureName:Microsoft-Hyper-V”.