What are a provisioning packages and what is for?
Well, provisioning package are created by Windows Imaging and Configuration Designer tool(aka Windows ICD) with “.ppkg” suffix. This package contains with a collection of configuration settings. It can used to configure Windows 10 devices without re-image it or redeploy Windows 10, make you to quickly complete the deployment with few or less hundreds of machines by IT or non-technical staff (e.g. employee/end user).
You can create provision packages for:
- Desktop devices
- Mobile devices
- HoloLens devices
- Surface Hub devices
- Kiosk devices
The benefits of using provisioning packages:*
- Make you to quickly configure new device without performing reimage.
- Available for both Windows 10 Mobile device & Windows 10 PCs.
- Easy to apply via USB flash drive or SD Card.
- Can configure a device without internet connection.
- Best suited for SMB (small to medium sized business)
- Remove all pre-installed software (for new device purchased at retail store)
- Ideally as a dynamic deployment solution for deploy Windows 10 on device with BYOD or CYOD.
- Enroll device to AD or AAD
- Upgrade product edition
- Configure Wi-Fi network
- Create local admin account
- Create device name (computer name / host name)
How can I get the Windows Imaging and Configuration Designer tool?
You can have 2 ways to get the Windows ICD via:
- Windows Assessment and Deployment Kit (ADK)
- Microsoft Store
Personally, I recommend to install Windows ICD via Microsoft Store cause that is far more easy and simple to get that tool than you got from Windows ADK.
- You open the Microsoft Store
- And you search key words with “Windows Configuration Designer”
- Then you click “Get” to install it (you must sign in before you can install apps from the Store)

For install it from Windows ADK:
- You download the latest version of Windows ADK from Microsoft (for now with ADK v2004)
- Then you double-click “adksetup.exe”
- Select “Imaging And Configuration Designer (ICD)” and install it (By default when you select ICD the Configuration Designer & USMT tool will be auto selected too)

How to create a provisioning packages with Windows ICD?
After you have installed the Windows ICD from above two way then you can start to do the work by create a provisioning packages. Follow below steps let’s try to create a simple but usefully .ppkg file with Windows ICD:
- Open the Windows Configuration Designer from Start menu (if you install from Microsoft Store, if you install from Windows ADK then you will see Windows imaging and Configuration Designer with a different icon shows up, basically just the same)

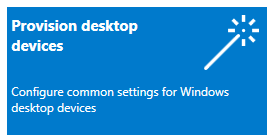
2. Since we will applied to a Windows 10 PC then we choose “Provision desktop devices” to create a project.
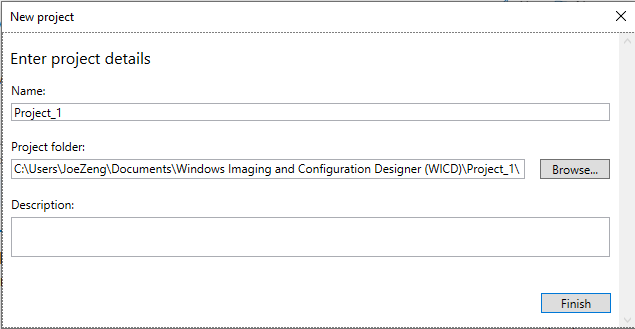
3. You name whatever you want for the project then hit “Finish”, but I go with default.
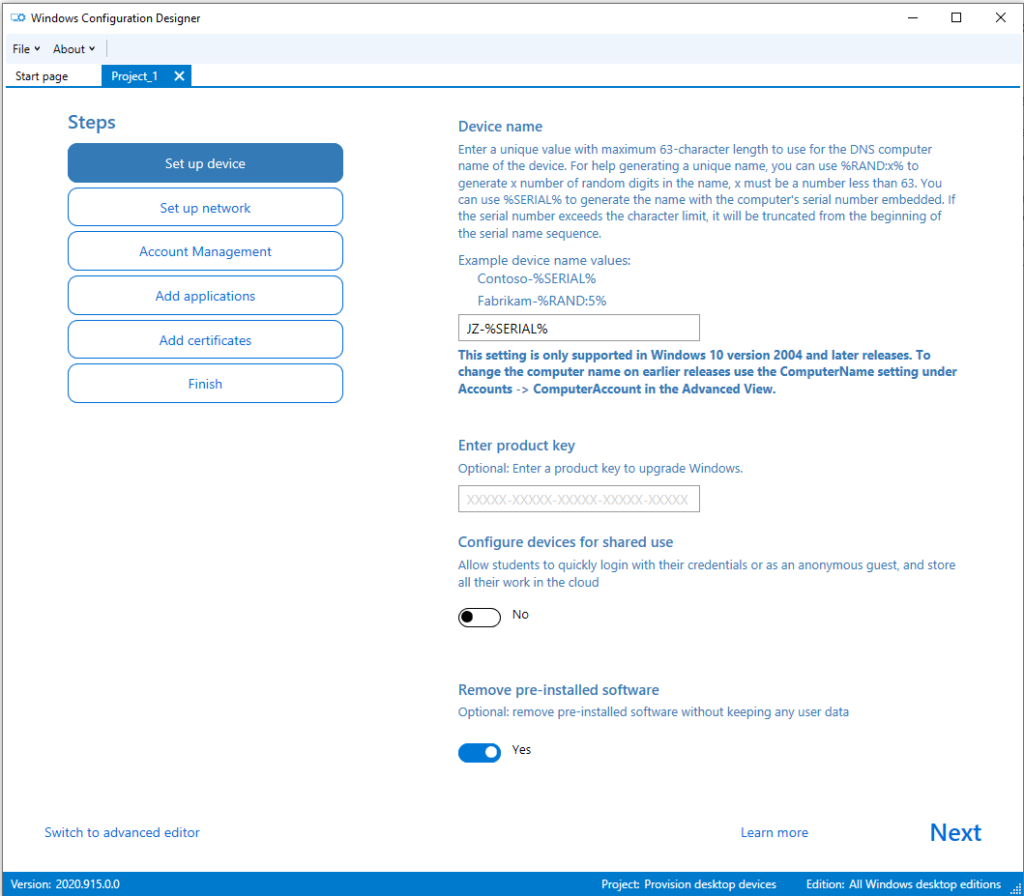
4. The first step is for set up device, you may set device name / enter product key / configure device for shared use / remove pre-installed software. (in this case, I setup device name with JZ + serial number of the machine and remove pre-installed software)
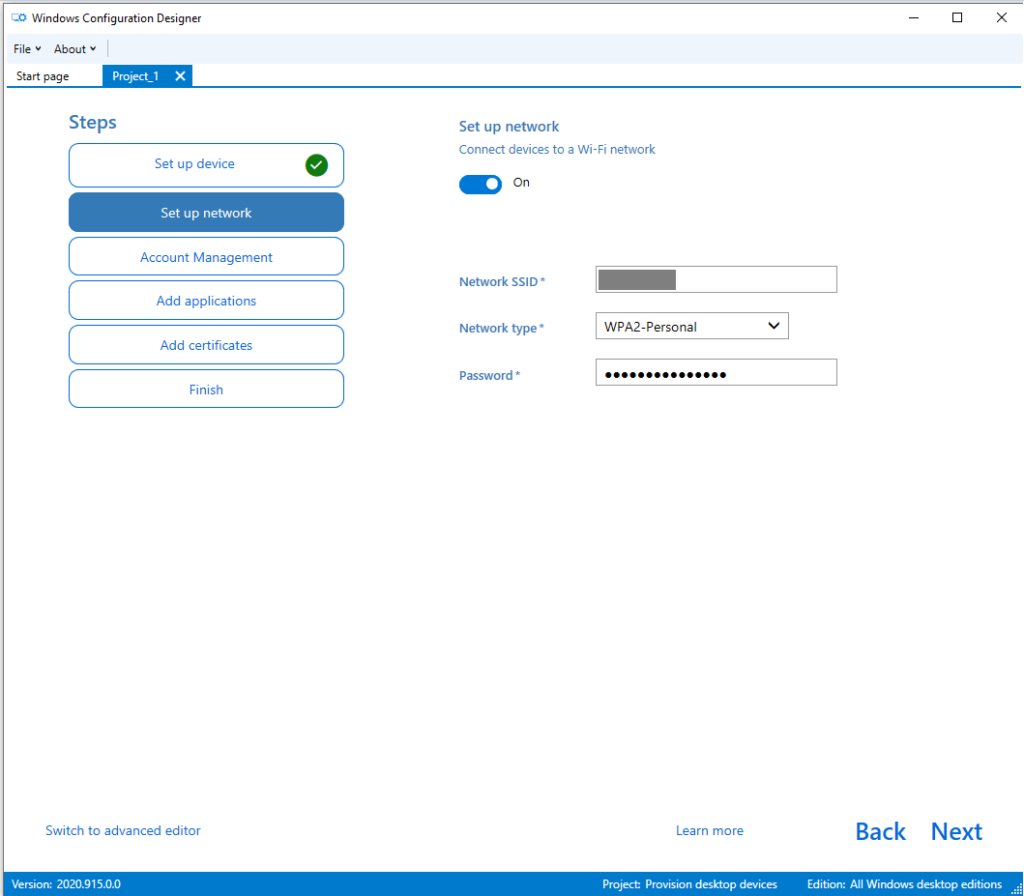
5. Next, we go with setup network enter the SSID & password cause our target machine is a laptop.
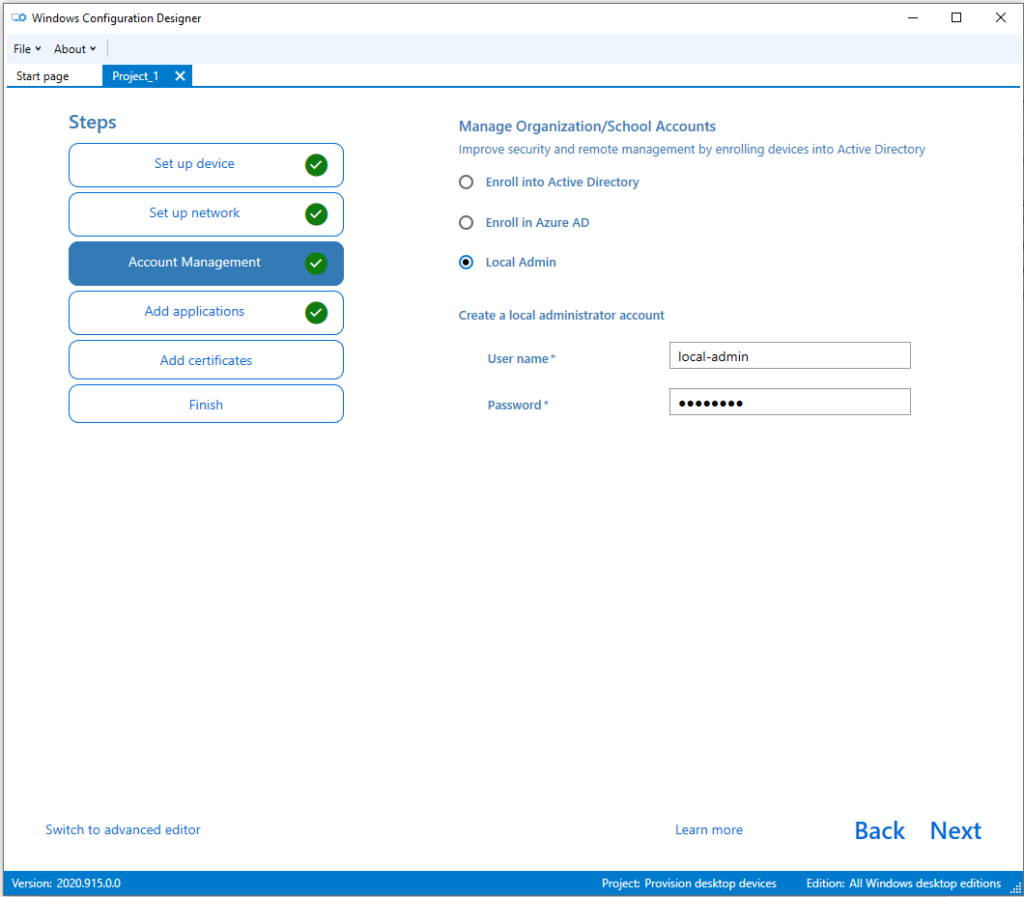
6. Then you can enroll the device to AD / AAD / create a local admin account, so we choose to create a local admin account since this Steps cannot be ignore.
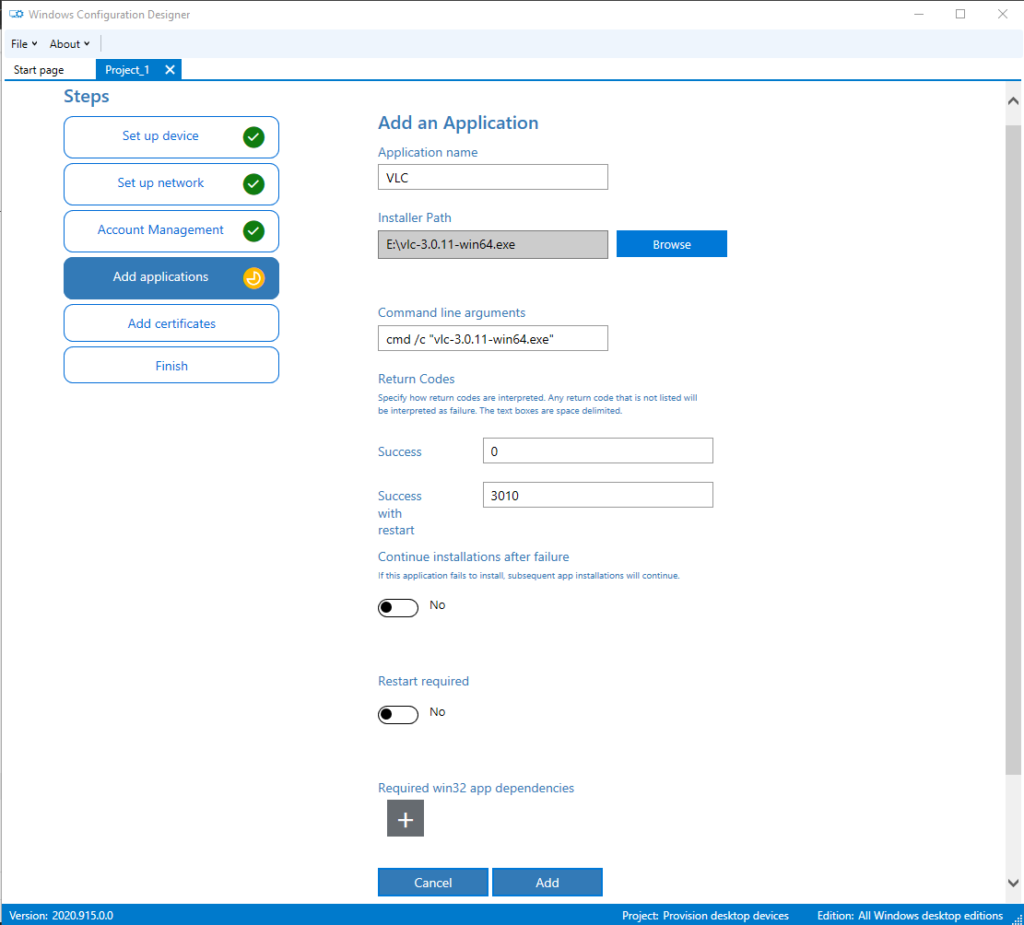
7. If you look at last steps closely you may noticed that the Steps 4 was being checked, because this steps is optional so if you accidentally clicked it will be checked and nothing is wrong. Says I want the target machine to be installed with VLC, then we enter the application name and provide with the installer path then hit “Add” (note the return code that’s good for troubleshoot when something goes wrong, and all you added application will be packed on your project the .ppkg file)
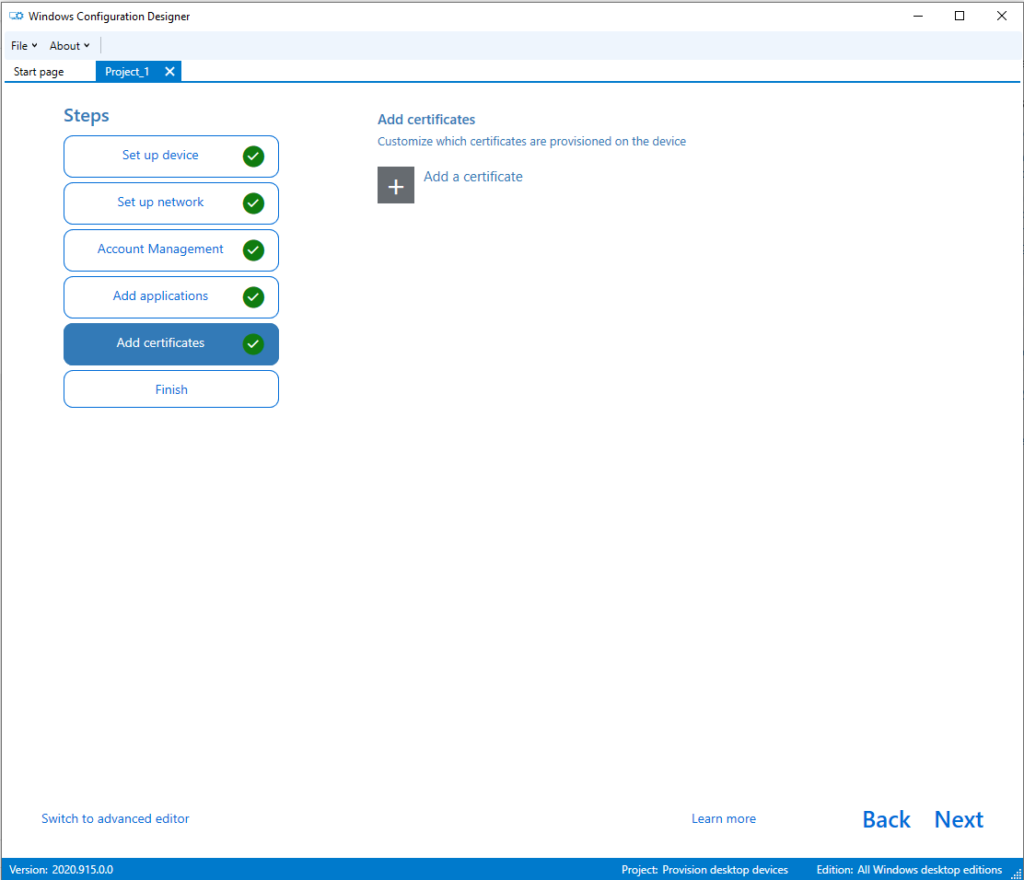
8. Steps 5 is also an optional you may just ignore it.
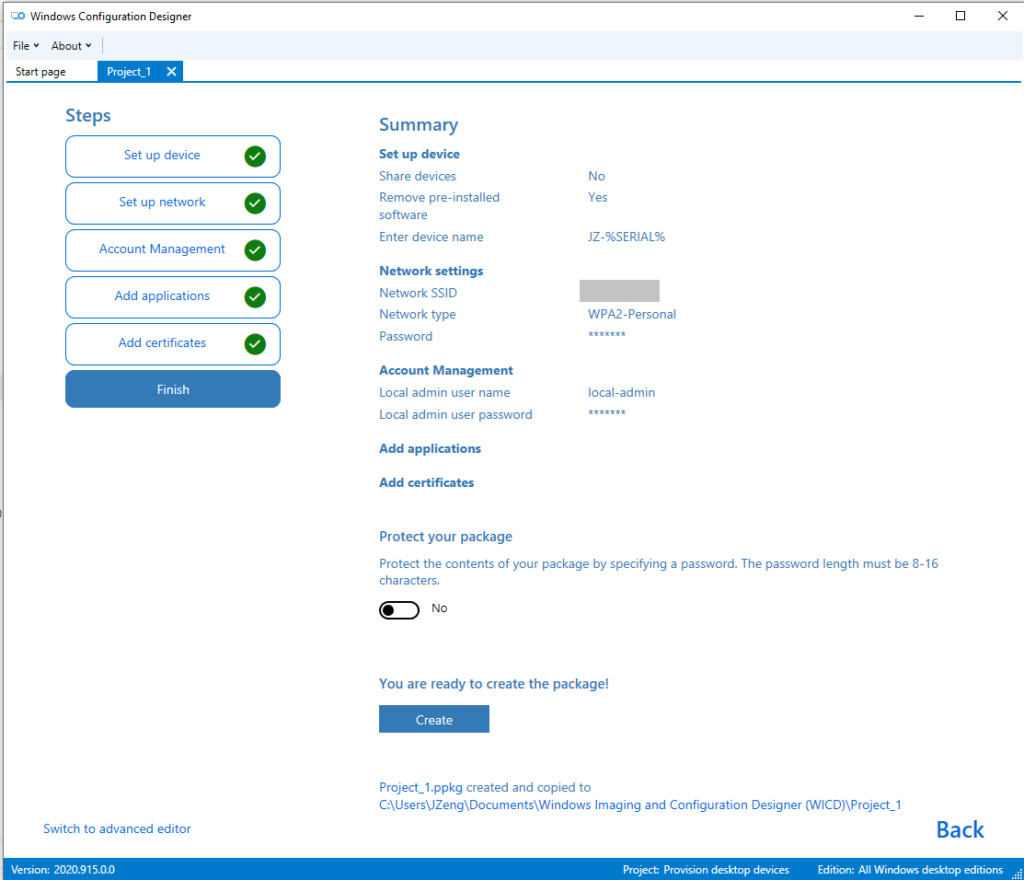
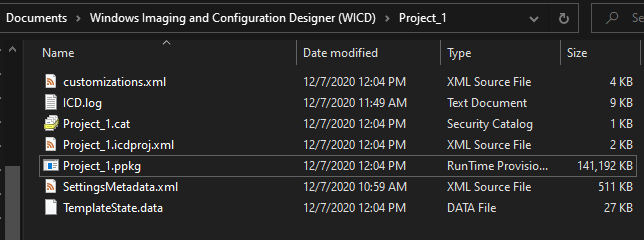
9. Okay, then the final steps is to review all your configuration if all good then click “Create” button. After that you can click the hyperlink with path to find your ppkg files. (Something needs to note here, if that project file contains with some sensitive information e.g. your company WiFi network and password you may better to set a password to protect your package by turn on “Protect your package” option.)
If I created provisioning packages how can I apply it?
That is a simple one. Remember did I mentioned earlier? You can apply that provisioning package via SD card or USB flash drive even with NFC tags and barcodes.
Let me show you how to apply the provisioning packages that your created before and apply it to a Windows 10 laptop via USB flash drive.
- Go to the folder that contain your Windows ICD file and copy all of them onto your USB flash drive. (in general the .ppkg file was very small depends on how many application you added to your provisioning packages)
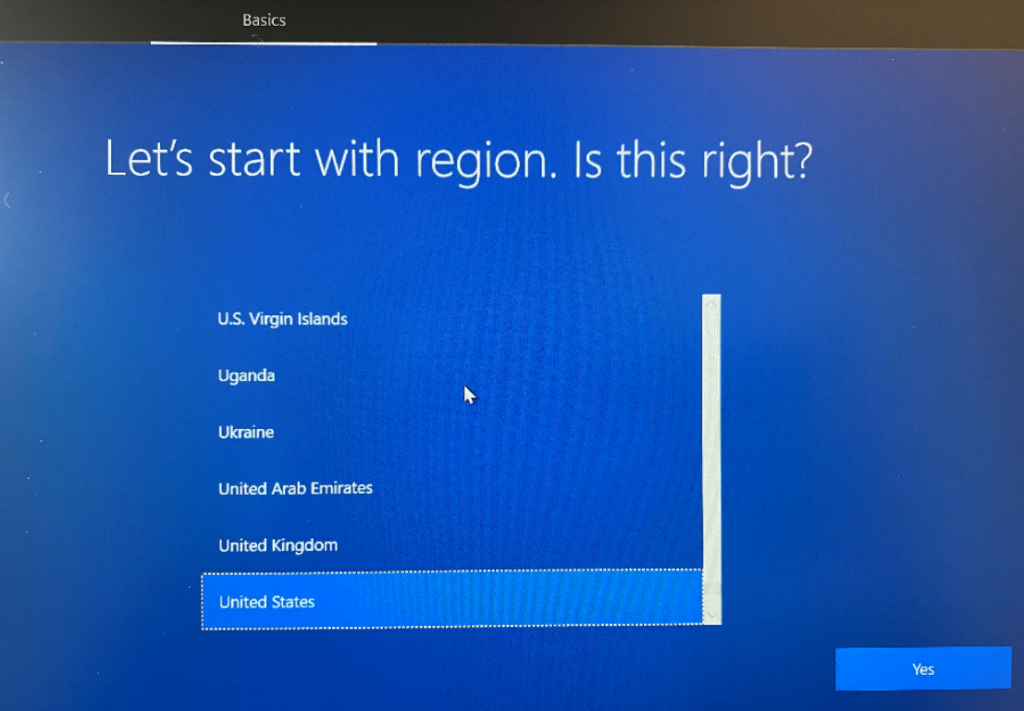
2. Boot up the new device and when it shows up OOBE interface then you plug-in that USB flash drive.
3. It will be automatically identified your .ppkg file. If you set the password to protect the project file it will prompt a window like below.
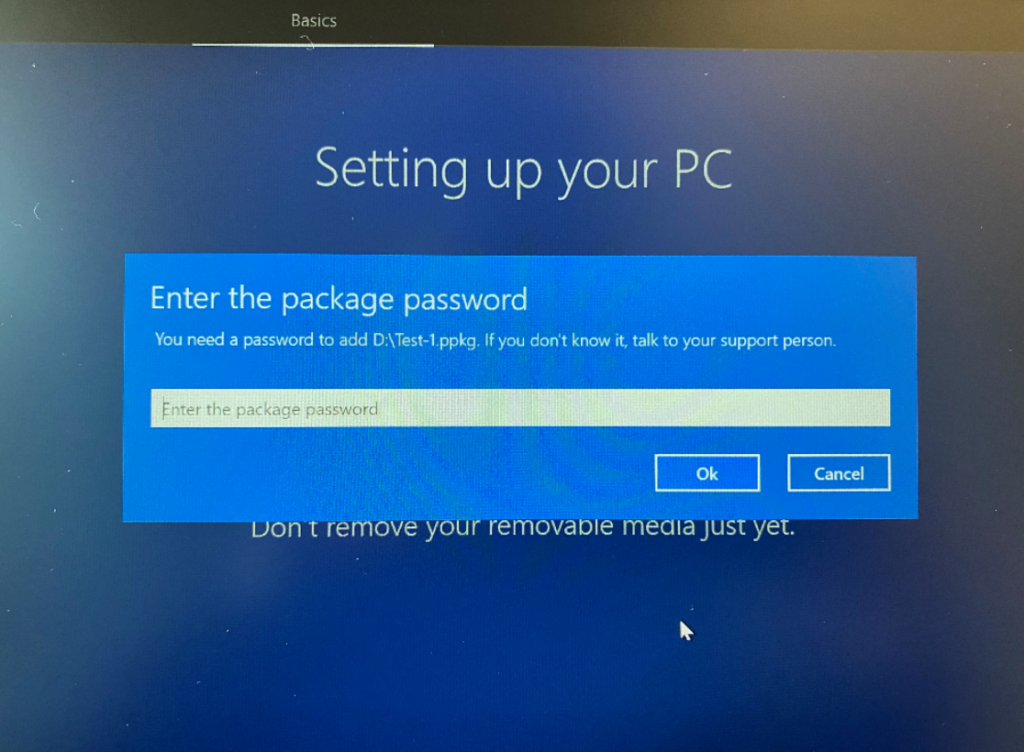
4. After you entered your password it will auto apply your created provisioning packages.
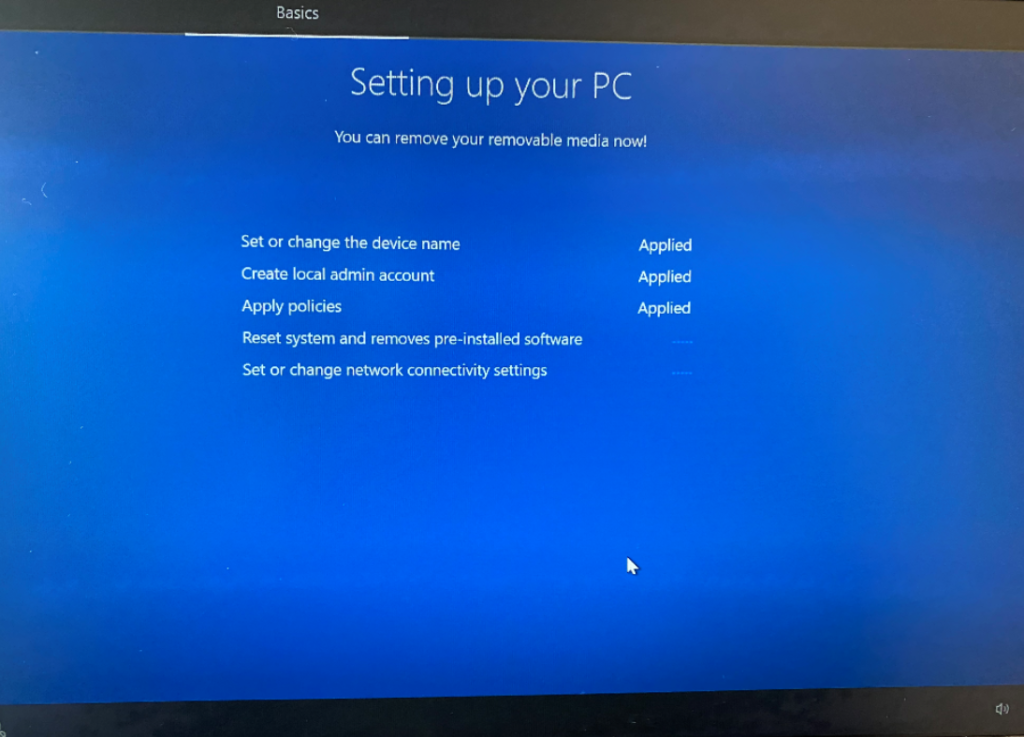
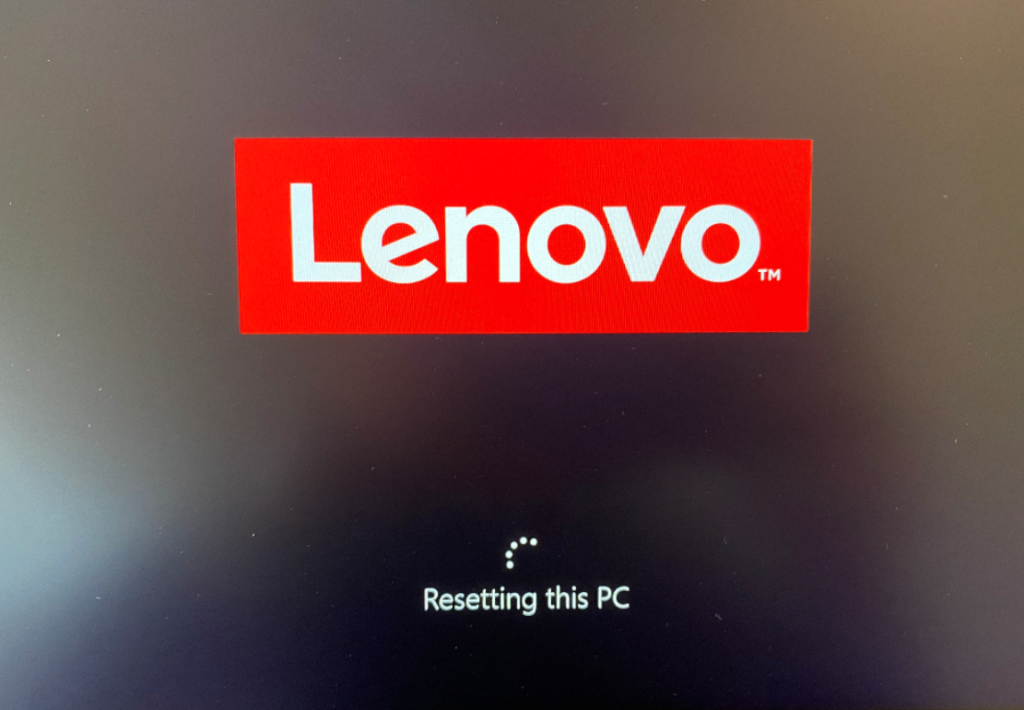
5. Depends on what kind of settings you configured usually it only takes 15mins around with 1-2 times reboot and showing “Resetting this PC”.
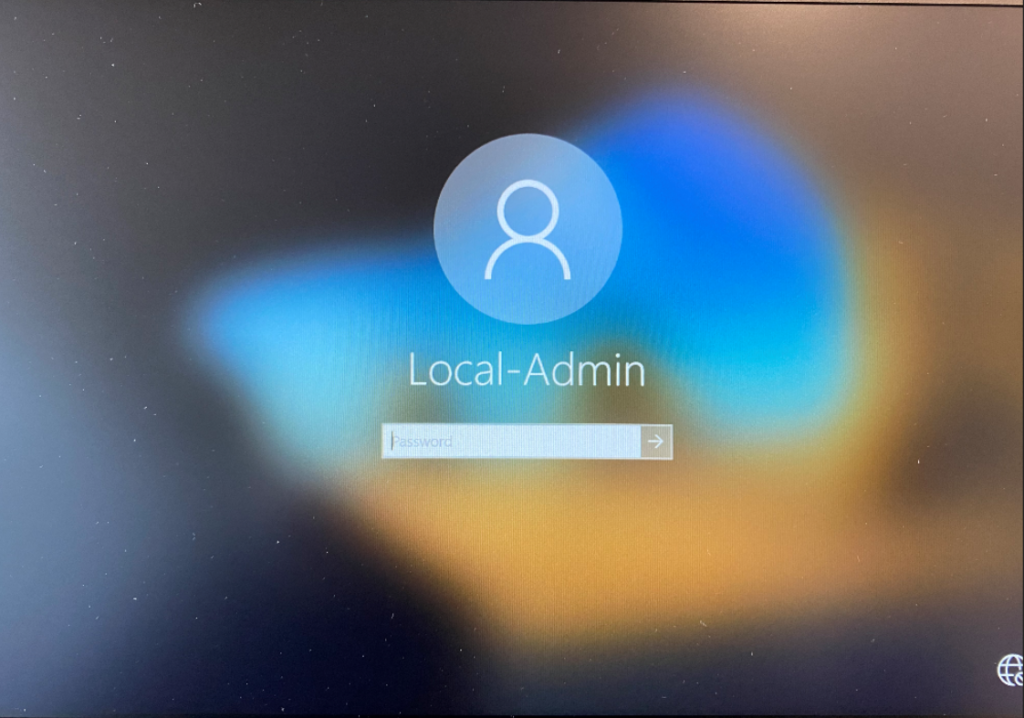
6. Then you can login with your pre-created local admin account to complete rest of settings.
Conclusion:
When you try to apply the ppkg file but the device was pass out OOBE then you have to perform a Reset from Windows Settings app and then to apply it.
Final thing to remember, a provisioning package that contains with common enterprise settings only apply to all desktop editions of Windows 10 except Windows 10 Home.
Still provisioning packages is a dynamic way to deploy Windows 10 machine in modern enterprise environment and it make whole easy to configure a device with or without IT pros.